
---------------------------------------------------------------------------------------------------------
Here's what you do (I do this all the time, adding fishnet or other colors to the bottom of tops. - i don't have pics, cuz I gave all the shirts away WAY before I had a camera, but I will show lots of drawings lol)
step one is to put the top on, and measure how much you want to add. between the bottom the the shirt,and where ever you want it to stop. write that down. you are gonna want to keep that number for later reference.
next:turn your top inside out and see if it has any side seams (some do, some don't, I'll tell you how to altar both)
also, once you figure out yes or no, you need to get a seam ripper
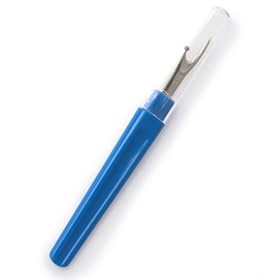
(These come in various sizes, this blue handled one is the most common. it doesn't matter what size you get)
You'll need to undo the bottom seam. (this goes for whether the shirt has side seams or not. either way, you'll need to undo the hem of the shirt - also, please be careful with the seam ripper. if you go too fast, you can end up cutting a huge hole in the material, or jabbing yourself, only one hurts, but both suck!)
now, IF YOUR SHIRT HAS SIDE SEAMS:
you'll need to undo about a quarter of an inch to half an inch up the side. this is so that when you attach the new piece, you can sew up the sides and only you will know that it wasn't originally made that way.
now. you'll need to get your material. my suggestion is to cut it to the measurement you wrote down from before. (with about half an inch added, for seam allowances.)
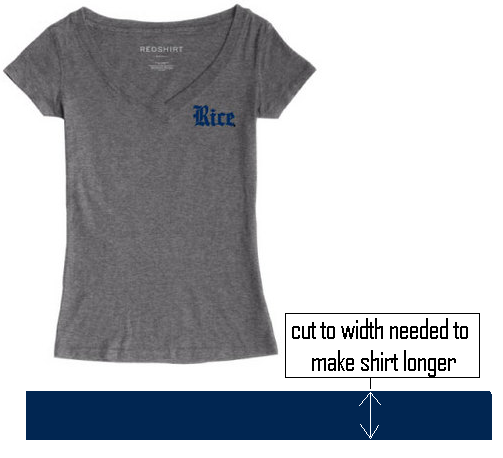
(please ignore the fact that this shirt isn't inside out.)
DO NOT WORRY ABOUT IT FITTING INTO THE SIDE SEAMS. I'm gonna show you a little trick to making it look more part of the garment.
now that's done, you'll need to do the above step TWICE. two sides to your top, to pieces of material.
this step, you'll have to do it twice as well. one side of a shirt is always larger than the other, because we are not flat.
here's what you do: take one piece of your material and lay it under one of the layers make sure the shirt is still inside out, and is still laying flat!
i usually use thin masking tape (also known as painter's tape) but you can use a chalk stick, or a washable ink marker that's made for sewing projects.
take note of the flare of your shirt. if it doesn't have one, don't worry, either way, this step is basically the same.
once you figure out the lines of your shirt, mark it, with either the tape or chalk, or whatever you have chosen for this (look at the labels, if you are using ink, make sure it will wash out, and not damage the material, when you are done) You will cut, again, about a quarter of an inch or more, outside of the line. that way, if your shirt stretches while you sew, you won't come up short. and if its too much, you can just cut the excess off.
next step:
pinning the material to your shirt: you are going to have to turn your shirt the right way. with the outside back on the outside. you are going to use pins

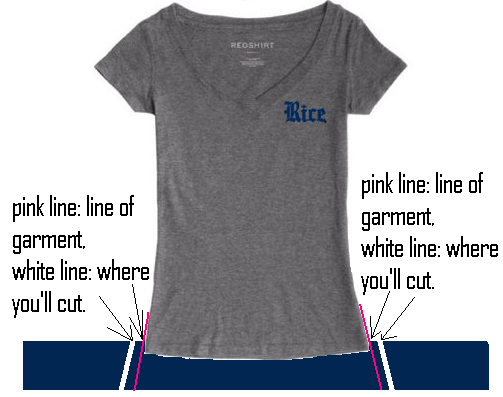
to secure the material to the shirt. also, the right sides of the material need to be facing each other. (the sides that everyone is going to see - you'll know the difference because one side is always a little lighter, or is the relief of the image. if you aren't sure, ask someone) follow the line of the shirt. line up the edge of the shirt with the edge of the material you are adding. don't worry about the lines you made earlier.
(in the pic, the pink lines are lined up with the edges of the shirt,because I messed up when i drew it. lol) if neither material stretches, you can get away with pinning it as pictured.

once you have pinned down one side, i recommended sewing it down. you may find that its easier if you pin down both sides before you sew, is easier. if it is, go for it. I prefer one side at a time, that way I don't lose any pins.
once your material has been sewn into place, you may have some excess hanging off the edges. trim it so it is all even. use the line of your shirt as a guide.
after you've done that, either you can surge the raw edges, or use what's called "Fray Check"

this will keep your edges from unraveling. Just follow the directions on the package. (if you can't get a hold of this, I'm sure there are other brands of something similar)
now that you have all your edges trimmed, everything's sewn down, you still have open side seams.... just follow the original seams on the shirt. make sure you back stitch all your seams. that will keep them from coming undone.
this is what a back stitch looks like. (make sure to keep it all lined up as much as possible)

most people don't use a back stitch, and may not know how to make one. you make it by pressing down the lever or button that has the upside down "U" shaped arrow either next to it, or on it.
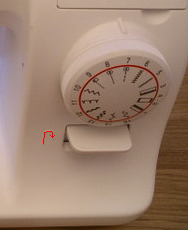
(see the arrow in red)
now that's done, you can fold the new edge of your shirt and sew it down. I suggest folding it twice before sewing it down. use the pins to hold it in place.
and your done!
If you don't have any side seams. same thing as before, find out how much you want to add to the bottom. all you have to do is cut one long piece, instead of two, line up the edges, right side facing each other, leave a little unsewn on each end, pin it, sew it down. once the majority of the edge is down, trim the excess, fold the open edges down and sew. I don't have pictures for this one, because its harder to draw. just play around with it. practice everything first, before you do it.[/quote]